Eagle Lake Woodworking is your source for woodworking projects and videos.

Motorized Router Lift

by John W. Nixon on February 11 2006 03:00

Currently rated 3.7 by 7 people

  • Currently 3.714286/5 Stars.
  • 1
  • 2
  • 3
  • 4
  • 5
Update - 2/21/09:

I added the first video in the series that shows how to wire the Motorized Router Lift. Stay tuned, there's more to come.


Update - 2/22/09:

The second video in the series has been released and shows the rest of the Motorized Router Lift wiring as well as how to put together the control panel.

control panel

If you're interested in purchasing the variable speed kit that I show in the wiring video, it's available as a kit or fully assembled from: Electronic Light


Device Description -
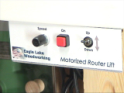
I motorized the raise and lower action of the table mounted router. There's a panel on the router table that has a toggle switch to control the direction of the lift, and a pulse switch to activate the lift. There's also a foot pedal that activates the lift, allowing you to use both hands to control the work piece while operating the lift.


Background -
The idea was born from my desire to make mortises with a router. I was on the verge of building a mortising jig for use with a plunge router. The concept of the jig is simple - control the movement of the router while incrementally plunging the bit to make the mortise. By motorizing the lift action of the router, I simulated the plunge (the z axis). By adding a tenon jig to the router table, I was able to control the x-y movement of the work piece. The combination of these two elements makes for highly effective and efficient router table mortising. With a router table that has an enclosed lower connected to dust collection, you get a nearly 100% dust free operation (using a spiral upcut bit, all the dust and chips is extracted below the table).

After installing and using the motorized router lift for a while, I realized there were many other benefits beyond mortising.


Some of the benefits -

  • Changing bits - my Motorized router lift is connected to a Hitachi M12V. Changing bits on this router when it's mounted in a table can be time consuming. With motorized router lift, I can drop the router down in a matter of seconds to easily change bits. The router go right back up to the ready position in seconds.
    Stopped Dados - I can start the bit in the middle of the work piece by raising it up with the lift. There's no more tilting the work piece onto a spinning bit to make a stopped dado.
  • Mortising - with the modified tenon jig equipped with stop blocks, I can setup and cut reproducible mortises in no time at all. This setup is great for making matching mortises for loose tenon joinery.
  • Incremental Passes - how often to you take too much off in one pass because you just don't feel like changing the bit height in between passes? With the motorized router lift, the pulse of a button on the table changes the bit height so making incremental passes is really easy.
  • Cutting Circles - I made a circle jig for the router table. It's the standard pivot type affair, but I can rotate the blank while raising the bit with the foot pedal and cut a circle fast and easy.


About the device -
My current version of the Motorized Router Lift is powered by an 18 volt screw driver (Black and Decker XD1200). I converted AC to DC and added a variable powered transformer to control the speed of the motor. I rarely adjust the speed, but it's nice to have that capability for raising the router at different rates depending on the operation. You could easily skip the AC to DC conversion and just use the battery (connected in a remote location) to power the device.
The screwdriver is connected to a hollow drive-shaft that take the place of the nut on the router's threaded rod. This drive-shaft turns against the router body to raise and lower the M12V.


FAQ -
Q. How do you stop the router at the desired depth?
A. I use the router's depth stop.

Q. Does the screwdriver motor continue to run when the router has reached max depth?
A. Yes, but it has a clutch that slips to prevent burning the motor. It's also easy to tell when the max depth is reached - I can hear that the bit is no longer cutting, and I let off the foot pedal.

Q. Do you have an indication of the bit height during the lift operation?
A. Yes, I have a digital caliper connected to the router, and a remote readout above the table that shows the relative amount the bit was raised. I can use this in conjunction with the depth stop to know when to let off the foot pedal.

Q. Do you need to have the VARIAC for controlling the motor speed of the lift?
A. No, if you can find a motor with a suitable RPM, there's really no need for a speed controller.

Q. Can I buy a Foot-Activated Motorized Router lift somewhere?
A. I am currently working with a company to bring the device to market. Patent is pending. Simple enough to build your own though.


Resources -
There's a lot of information on this site site about the Motorized Router Lift. I have videos of the lift in action, pictures, and documents describing the components.

Part 3 of my pool table build showcases the Motorized Router Lift for making mortises:
Arts and Crafts Pool Table Build

My Article about the Motorized Router Lift in Woodshop News  

Laminate Press

by John W. Nixon on October 24 2005 03:00

Currently rated 4.5 by 2 people

  • Currently 4.5/5 Stars.
  • 1
  • 2
  • 3
  • 4
  • 5

I often laminate or veneer sheet goods. Not having the money for a vacuum setup, I created a Lamination Press that stows above my workbench and out of the way when not in use. The press has four cauls that suspend from the main beam, and can be configured every six inches (there is space for 10 cauls).


Turning a nut against the lower face of the main beam tightens the cauls down. With a 3ft x 5ft capacity, this press has come in handy many times for gluing up field panels and for veneer work.


You can see the laminate press in action in the Oak Blanket Chest video.

Crosscut Sled

by John W. Nixon on March 20 2005 03:00

Currently rated 5.0 by 1 people

  • Currently 5/5 Stars.
  • 1
  • 2
  • 3
  • 4
  • 5
Update 2/21/2009 -

Check out the next generation of this sled.


This sled has been good to me, but I find myself using Wood's universal tablesaw sled more and more lately. My sled has a 1/2 thick inch bottom that I made by laminating two pieces of hardboard. It was stuff I had laying around, but it was sort of melamine coated on one side and rough on the other. I thought the melamine side would be less friction, so that side is down in contact with the tablesaw top. I though the rougher side would be good to hold the workpiece a bit.


Here's the quick summary of how I went about constructing it. I made some material for the runners (plane it down until is fits perfect (even a little tight perhaps). I used oak, but if I had it to do over, I'd use the UHMV plastic material. Place the runners in the miter slots and then put on a couple of pieces of double stick tape on top of the runners (or on the bottom of the sled). Without contacting the tape just yet, position the sled's base onto the runners. Now contact the tape to stick the runners to the bottom of the sled. Hopefully you can get the runners out and still have them stuck to the bottom of the sled. I've seen other methods - like super glue and brad nails from above. The point is, you want those runners to be positioned where they should be and then flip the whole thing upside down and secure them for good (I used countersunk screws in the bottom).


After your runners are secured to the base and sliding well, it's time to attach the tall backer board. To get the backer board square, you position your sled's base and raise the running blade so that it cuts through your new sled. Bring the blade up in the middle of the sled. That is, don't cut all the way through the front or rear of the sled base. At this point you can take a framing square against your blade and draw a line square to the blade where your backer board will mount to.


I made my backer board from left over mahogany that I had, but any straight flat hardwood would do. The t-track modifications I made to the backer board have been terrific. There's no substitute to having stop blocks for repeatible cuts.

Shopsmith Sander

by John W. Nixon on November 27 2004 03:00

Be the first to rate this post

  • Currently 0/5 Stars.
  • 1
  • 2
  • 3
  • 4
  • 5

Widget Administration not found.

It is an error to use a section registered as allowDefinition='MachineToApplication' beyond application level. This error can be caused by a virtual directory not being configured as an application in IIS. (G:\PleskVhosts\eaglelakewoodworking.com\httpdocs\admin\web.config line 3)X

Email Notifications

Add your email address to the video notification list:
We have created this privacy policy to demonstrate our firm commitment to your privacy and the protection of your information.

Our email is permission based. If you receive a mailing from us, our records indicate that (a) you have expressly shared this address for the purpose of receiving information in the future ("opt-in"), or (b) you have registered or purchased or otherwise have an existing relationship with us. We respect your time and attention by controlling the frequency of our mailings. If you believe you have received unwanted, unsolicited email sent via this system or purporting to be sent via this system, please forward a copy of that email with your comments to abuse@constantcontact.com for review.

How can you stop receiving email from us? Each email sent contains an easy, automated way for you to cease receiving email from us, or to change your expressed interests. If you wish to do this, simply follow the instruction at the end of any email.

How we protect your privacy We use appropriate security measures to protect against the loss, misuse and alteration of data used by our system. Sharing and Usage We will never share, sell, or rent individual personal information with anyone for their promotional use without your advance permission or unless ordered by a court of law. Information submitted to us is only available to employees managing this information for purposes of contacting you or sending you emails based on your request for information, and to contracted service providers for purposes of providing services relating to our communications with you.

Use of Web Beacons When we send you emails, we may include a web beacon to allow us to determine the number of people who open our emails. When you click on a link in an email, we may record this individual response to allow us to customize our offerings to you. Web beacons collect only limited information, such as a cookie identifier, time and date of a page being viewed, and a description of the page on which the Web Beacon resides (the URL).

Web Beacons can be refused when delivered via email. If you do not wish to receive Web Beacons via email, you will need to disable HTML images or refuse HTML (select Text only) emails via your email software.

What's New?

Skip Navigation Links.
Collapse <div style="width:145px; text-decoration:none;">5 Most Recent Posts per Category</div>
5 Most Recent Posts per Category
Expand NodeFine Woodworking
Expand NodeGeneral Carpentry
Expand NodeIn The Shop
Expand NodeEagle Lake
Expand NodeQ & A

RecentComments

Comment RSS
High Quality